


Properly storing bumper plates is one of the best ways to ensure they last for as long as possible. If you’re building or reorganizing your gym, you may wonder which storage solution is best for you.
How do you properly store bumper plates? You can store bumper plates on a vertical plate storage tree, a plate stacker, a horizontal plate organizer, wall-mounted storage pegs, or an A-frame storage rack. You may be able to get storage pegs that bolt onto your squat rack. You can also get a mass storage system or make a DIY storage rack.
In this article, I’ll discuss why it’s necessary to store bumper plates properly and what you need to consider when storing them. I’ll also provide several bumper plate storage ideas you can buy or make yourself.
Table of Contents
Why Is Proper Storage Necessary for Bumper Plates?
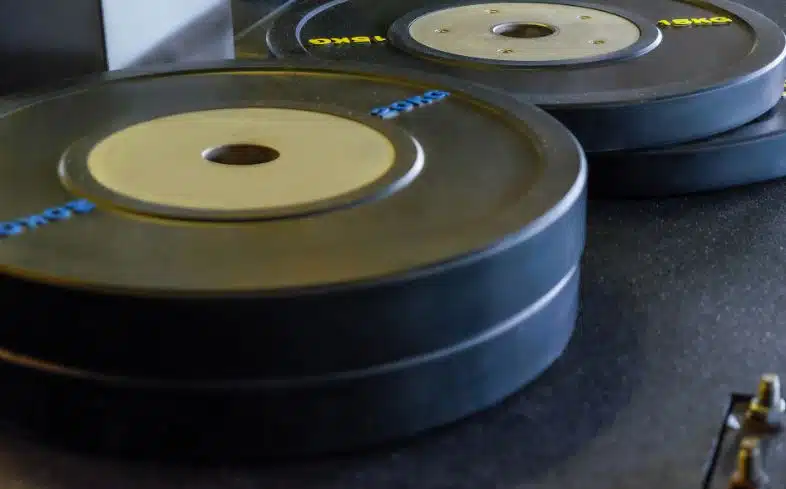
Storing your bumper plates properly is necessary because it ensures they’ll last for a long time, keeps you and other people safe, and protects the plates from damage. It also keeps your gym space and the plates organized so you can easily and quickly grab whichever weights you need during your workout.
Bumper plates are expensive, and when you spend a lot of money on them, you don’t want them to break after just a few months. Many brands offer warranties on their bumper plates, but they won’t cover negligent use. Improper storage may fall under negligence and void the warranty, so you’d have to pay for a whole new set.
Furthermore, bumper plates already take a lot of abuse from heavy training, especially if you use them for CrossFit or Olympic weightlifting. You don’t want to risk them falling apart in the middle of a lift due to careless storage methods that compromised their construction.
Storing bumper plates the right way also ensures the safety of you and other people who use the gym (whether it’s a commercial or home gym). Bumper plates are easy to trip over, and storing them when they’re not in use can prevent injuries.
It also prevents them from getting hit by other equipment that other people are using nearby, which can lead to them getting bent or dented.
If you’re still searching for bumper plates to add to your gym, check out this article with the best bumper plates I tested.
5 Things to Consider When Storing Bumper Plates

Five things to consider when storing bumper plates are:
- Budget
- How much space you have
- How many bumper plates you have
- Weight capacity
- How much other equipment you need to store
1. Budget
Budget is important to consider, so you don’t spend more money than you’re comfortable with on a bumper plate storage rack. In some cases, they’re affordable and cheaper than bumper plates. Other times, they’re more expensive than the bumper plates themselves.
Deciding how much you’re willing to spend before you start shopping will allow you to narrow down your search to the brands and racks that suit your budget.
2. How Much Space You Have
Bumper plate storage solutions vary between having small footprints and taking up a large amount of space. Before you make a large purchase, measure the area where you want to put your storage rack and double-check the rack’s dimensions to ensure it will fit.
It may be helpful to outline the area where you want to put your storage rack with tape or chalk. This will give you a better visualization of how the rack will fit alongside things like a squat rack, an exercise bike, or a cable machine.
Looking for ideas on what you can fit in a small home gym? Check out our small home gym floor plans:
3. How Many Bumper Plates You Have
Bumper plates can be bulky, especially at 35, 45, and 55lbs. If you know the widths of your bumper plates and the length of the pegs on your preferred storage rack, you can gauge how many plates will fit on one post.
This will ensure you can fit as many bumper plates as possible on your storage rack.
Also, think about whether or not you’ll add to your bumper plate collection in the future. Getting a storage rack that fits the number of bumper plates you have now with some extra room will prevent you from having to buy another one later on.
Wondering what the differences are between bumper plates and other types of plates? I compare various types of plates in 15 Types of Weight Plates Explained (Differences, Pros, Cons).
4. Weight Capacity
Perhaps even more important than the number of plates you have is how much they weigh collectively. Most bumper plate storage racks have weight limits, and you don’t want to be stuck with a storage rack that can only hold 200lbs when you have 400lbs worth of plates (though, of course, you can always buy more than one if needed).
When looking for a bumper plate storage rack, consider how much the plates you have now weigh in total and how many more you may add in the future. If you want to avoid having to buy multiple storage racks in the future, buy one that supports a lot of weight so you can grow into it.
5. How Much Other Equipment You Need to Store

While some bumper plate storage racks only hold plates, others can also hold barbells, kettlebells, dumbbells, medicine balls, and smaller gear like belts or jump ropes.
Consider whether you want a solution just for your bumper plates or if you want a rack that can store multiple pieces of equipment. If you want a storage rack that can organize all of your equipment, you’ll have to look for one that can accommodate more than just bumper plates.
Looking to upgrade your gym equipment? Explore our top picks for the best weight plates for durability, functionality, and value.
How to Store Bumper Plates When You Have Limited Space
1. Wall-Mounted Storage Posts
If you don’t have a lot of other things lined up along the walls of your gym space, wall-mounted storage posts are an excellent space-saving option.
They keep your bumper plates off the floor, so you have more room to work out or to place other pieces of equipment like a treadmill.
2. Rack-Mounted Storage Posts
Depending on your squat rack, you can get storage posts that go directly onto the rack. This saves a lot of space since you don’t have to find a place for another piece of equipment.

For example, Rogue Fitness offers a compatible expansion kit for its SML-2 squat rack that turns the rack into a half-rack (which is a cross between a squat stand and a full power rack). You can then purchase plate storage posts that fit directly onto the rack.
Like wall-mounted storage posts, rack-mounted storage posts are great for small spaces because you don’t have to buy additional bulky pieces for your gym that take up even more room.
3. Vertical Bumper Plate Stacker
A vertical bumper plate stacker like the Titan Fitness vertical weight plate storage with wheels is suitable for small spaces. It has a 24” by 24” footprint and can easily fit right next to your squat rack. If needed, you can simply wheel it out of the way when you’re not using your plates.
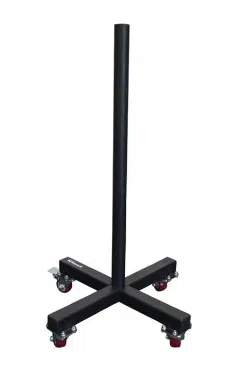
It’s also a good option if, for example, you have a garage that serves as both your gym and your household storage space. You can easily move it around to make room for other items if needed.
The only thing I don’t like about storage racks like these is that you have to unload every single plate when you need the ones on the bottom.
Then, depending on how much room you have, you may have to put the ones you’re not using back onto the rack, so they’re not in the way during your workout and unload them again when you have to put the heavier weights away.
However, this is just a minor inconvenience. A vertical plate stacker is still suitable if you need a simple, compact bumper plate storage solution.
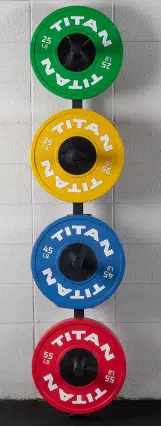
4. Vertical Plate Storage Trees
Vertical plate storage trees like Rep Fitness’s bar and bumper plate tree have one vertical post for support and horizontal pegs for the bumper plates. As an added bonus, they have slots to store barbells.

These are ideal if you’re trying to maximize your storage solution to hold as much equipment as possible. Since they aren’t very wide, you can fit them in a corner of your gym space to keep them out of the way. You can also keep one next to your squat rack so you don’t have to go far to switch your plates when you need to change your weights.
5. Bike Racks
It’s unconventional, but I’ve seen people use bike racks to organize their bumper plates.

Because they tend to be less expensive than storage racks from fitness equipment brands. They're a great option if you’ve maxed out your gym budget on other things and don’t want to spend too much money on a storage rack.
6. A-Frame Racks
An A-frame rack is a triangular-shaped rack with four to eight storage posts. It’s not as tall as a vertical storage tree, so they don’t take up much room. However, most have small weight capacities (250-300lbs).

These tacks are good if you have a lot of change plates or fractional plates. There isn’t always a lot of room between the storage pegs, so you can put your bumper plates on the bottom posts and the smaller plates on the top posts.
How to Store Bumper Plates When You Have More Space
1. Mass Storage System
Mass storage systems like the Titan Fitness mass storage system or Rogue Fitness mass storage system take up a lot of room and are better suited for larger gym spaces. However, they can hold various equipment in addition to bumper plates (like dumbbells and kettlebells).
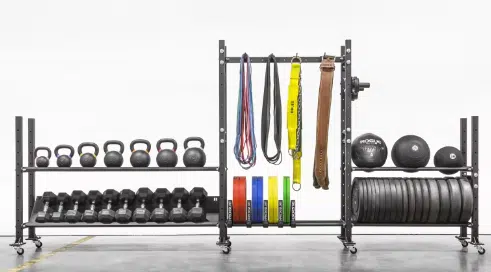
What I like about mass storage systems is that they are customizable. You can choose different heights, lengths, numbers of shelves, and shelving types (i.e., flat shelves for kettlebells or angled shelves for dumbbells). They’re easy to tailor based on the amount of space you have and other equipment you need to store.
Many mass storage systems also have corner add-ons available so you can combine more than one system and maximize every inch of your gym space.
2. Horizontal Bumper Plate Storage
Horizontal storage racks (which are sometimes also called toaster racks) like Titan Fitness’s horizontal weight plate storage rack take up more floor space because they’re long.

You can place horizontal bumper plate storage racks against a wall or next to your squat rack, but most of them can only hold bumper plates. This means you’ll have to get other storage racks for the rest of your equipment, and you’ll need an adequate amount of space to do so.
DIY Bumper Plate Storage Options
Building a storage rack yourself is an excellent way to save money and ensure the storage rack fully suits your needs.
Fortunately, DIY bumper plate storage racks are easy to create and only require a few items you can buy online or at a home improvement store.
DIY Wall-Mounted Bumper Plate Storage
What You Need
- Cordless drill
- 1 – 6’ 2×4
- 4 – 12” long 1” steel pipes
- 4 – 1” floor flanges
- 4 – 1” caps
- 16 – #14 screws 1 ½” long
- 3 – 4” lag screws
- 3 – ¼” washers
- Stud finder
- Drywall anchors
- Black spray paint (optional)
How To
- Lay the 2×4 on the floor and line bumper plates on it. Leave a couple of inches in between each plate.
- With a pencil or marker, make a mark on the wood in the center of each bumper plate insert. This will indicate where the storage pegs need to go.
- Center a flange over one of the marks you just made and drill pilot holes where the screws will go. The pilot holes will prevent the wood from splitting.
- Secure the flange to the plywood with the #14 1 ½” screws.
- Repeat steps 3 and 4 for the remaining flanges.
- Screw the caps onto each of the pipes, then screw the other end of the pipes into each flange.
- If you want to spray paint the rack, take it outdoors, spray paint it, and let it dry.
- Drill holes for the lag screws into the plywood. Make one hole at the top, one in the middle, and one at the bottom.
- Use 4” lag screws to attach the plywood to the wall. Important – make sure you drill into a stud or use drywall anchors to prevent the rack from falling over.
If you prefer to follow along with a video, check out:
DIY Bumper Plate Storage Tree
What You Need
- 2 – 92” 2×4's
- 1 – 1.5 x 48” poplar dowel rod
- #12 x 2” pan head sheet metal screws
- 1.5” washers
- 3” wood screws
- Wood glue
- Wood stain (or whatever color you prefer)
- Caster wheels
- Mitre saw
- Drill press (optional – you can use a cordless drill if needed)
- Cordless drill
- 1.5” forstner bit
- 1/8” drill bit
- 5/16 drill bit
- Pocket screw jig
- Sander
- Sandpaper
How To
- Cut the 2x4s into two 39” pieces, a 27.75” piece, two 18” pieces, and a 12” long piece.
- Cut the poplar dowel into five 8” pieces. You will have one shorter piece left over.
- Place one of the 39” pieces on the floor or a work bench and set two bumper plates on it with a couple of inches in between them.
- With a pencil or marker, trace a circle along each bumper plate insert. From the bottom of the wood post, the circles should be at 9.5 and 28 inches.
- Repeat step 2 with the other 39” 2×4.
- On one of the 39” pieces, cut one end to a 110-degree angle and the other end to a 140-degree angle.
- On the other 39” piece, cut both ends to a 110-degree angle.
- Cut 110-degree angles on both ends of the 12” 2×4.
- Use a kreg jig to make pocket holes on each end of the 2x4s.
- On each of the 39” 2x4s, use a 1.5” forstner bit to drill holes for the weight pegs. Only drill about ¾ of the way through.
- With a ⅛” drill bit, drill holes in the center of the larger holes. This is where the screws will go.
- Drill pilot holes into the bottom of each dowel to prevent the wood from splitting and help the screws go in easier.
- Use sandpaper to smooth the edges of the dowels.
- Put some wood glue into each of the holes, then put the dowels into place. The end where you drilled the pilot holes should go on the bottom.
- Flip the 2×4 over and drill pilot holes for the screws.
- Put washers over the center of each pilot hole, then insert the 3” wood screws.
- Repeat steps 12-14 for the other 39” 2×4, the 12” 2×4, and the 27.75” 2×4. Make sure you use the shortest dowel for the 12” piece.
- Place the 27.75” 2×4 on a work bench with the dowel pointing up.
- Line up one of the 39” 2x4s along the bottom edge of the 27.75” piece.
- Drill the 2-inch screws into the bottom.
- Repeat steps 19 and 20 for the other 39” piece
- Drill 2.5-inch pocket screws at the top of the upright posts.
- Drill three 3” wood screws from the bottom of the frame into the side pieces.
- Secure the 12” 2×4 about halfway down the frame.
- Lay the frame on its side.
- Put wood glue in the center of one of the 18” pieces and secure it perpendicularly to one end of the frame.
- Drill three wood screws from the bottom and two wood screws from the top into the leg.
- Repeat steps 25 and 26 for the other leg.
- Use a sander to smooth out the wood.
- If desired, stain or paint the wood with whichever color you prefer. Let it dry completely.
- Add caster wheels to the bottom of the rack if you want to make it more portable.
For a video tutorial to follow along with, check out:
DIY Horizontal Bumper Plate Organizer
What You Need
- 14” 2x4s (Count how many bumper plates you have and add 1 to that number. This is how many 14” 2x4s you need.)
- 2 – 2x4s (Stand all of your bumper plates on the ends with a couple of inches in between each one, then measure the length. Add 2-3 inches to that number to ensure you have enough room to fit all the plates. This is how long the larger 2x4s should be.)
- Wood screws
- Cordless drill
- Sander
- Paint of your choice of color (optional)
- Caster wheels (optional)
How To
- Set the larger 2x4s on the floor horizontally on the smaller side. They should be parallel to each other.
- Take one of the 14” 2x4s and line it up inside one end of the larger 2x4s. This will act as one of the end caps for your storage rack.
- Make two pilot holes at the ends of the longer pieces of wood where the wood screws will go. This will ensure the wood doesn’t split when you put the screws in.
- Drill wood screws into each of the pilot holes to secure the 14” 2×4 into the longer pieces.
- Place one bumper plate against the end cap. Take another 14” 2×4 and slide it up to the plate so it “cradles” the plate. Leave a little bit of wiggle room – the bumper plate shouldn’t fit too snugly inside the dividers.
- Drill wood screws into each side of the longer 2x4s to secure the second divider.
- Repeat steps 5 and 6 until you’ve placed dividers for all of your bumper plates.
- Once you get to the end, you may have some excess wood on one end. You can either leave this if it’s not too significant or cut the excess with a saw.
- Use a sander to smooth the wood.
- If desired, paint it with the color of your choice.
- If you want to make the rack portable, you can attach caster wheels to the bottom.
- Flip the rack, so the bottom faces up.
- Place a caster wheel along one corner and use a pencil to mark where the screw holes are.
- Drill pilot holes where each of the screws will go, then place the caster wheel on the frame again and drill the screws into place.
- Repeat with the other three caster wheels.
For a video tutorial, check out:
How NOT To Store Bumper Plates: 2 Rules to Follow
Bumper plates are pretty durable. But if you want to ensure their longevity and protect yourself, other people, and your other equipment, follow these two rules when storing them:
- Don’t leave them scattered around the gym
- Don’t leave them outside uncovered
1. Don’t Leave Them Scattered Around the Gym
I know how annoying it is to have to clean up all of your equipment at the end of a tough workout, but you shouldn’t “store” your bumper plates by leaving them lying around the gym.
If you work out in a commercial gym, it’s disrespectful to the owners and other members. And in both commercial and home gyms, it can pose a safety hazard since other people can trip over them.
2. Don’t Leave Them Outside Uncovered
Bumper plates can take a beating during training, but they’re not impervious to damage from extreme weather if you leave them outdoors uncovered.
Leaving them in the sun, for example, can cause the rubber to deteriorate over time. They can then bend or crack more easily when dropped from overhead. Sunlight can also make them very hot to the touch and cause minor burns.
Furthermore, leaving them exposed to moisture from rain, snow, or humidity can cause the inserts to rust.
If you live in a place where the temperature changes drastically from day to night, it can also lead to faster degradation. Rubber expands and shrinks depending on the temperature, and rapid temperature changes aren’t good for the bumper plates’ longevity.
Frequently Asked Questions
How Do You Store Bumper Plates?
You can store bumper plates on a vertical plate storage tree, an A-frame storage rack, or a horizontal storage rack. You can also get storage posts to attach to your squat rack (depending on the model) or secure storage posts to your wall. If you have a lot of space, you can get a mass storage system.
Can You Stack Bumper Plates?
Yes, you can stack bumper plates. If you do so, ensure you stack them from heaviest to lightest, so the lighter weights don’t have to support all of the weight.
Can You Store Bumper Plates on the Floor?
You can store bumper plates on the floor. Stack them from heaviest to lightest so the lighter weights don’t get damaged from supporting the heavier ones. Also, if your floor temperature alternates between hot and cold during the day, put a mat under them to prevent degradation from frequent temperature changes.
Can You Leave Bumper Plates in the Heat?
You can store bumper plates in warm temperatures, but you shouldn’t store them in direct sunlight. They can get hot to the touch, and the sun may cause the rubber to deteriorate over time. Also ensure the temperatures don’t go from very hot to very cold too frequently, which can also cause degradation.
Can You Store Bumper Plates Outside?
You can store bumper plates outside as long you keep them out of direct sunlight and protected from moisture. Keep them under a covered patio or awning or put a tarp over them when you’re not using them.
You can also spray a UV protectant on the rubber and rub a light layer of 3-in-1 oil around the metal inserts. If you have to keep your bumper plates outside, these will offer some protection from the elements.
About The Author

Amanda is a writer and editor in the fitness and nutrition industries. Growing up in a family that loved sports, she learned the importance of staying active from a young age. She started CrossFit in 2015, which led to her interest in powerlifting and weightlifting. She's passionate about helping women overcome their fear of lifting weights and teaching them how to fuel their bodies properly. When she's not training in her garage gym or working, you can find her drinking coffee, walking her dog, or indulging in one too many pieces of chocolate.