

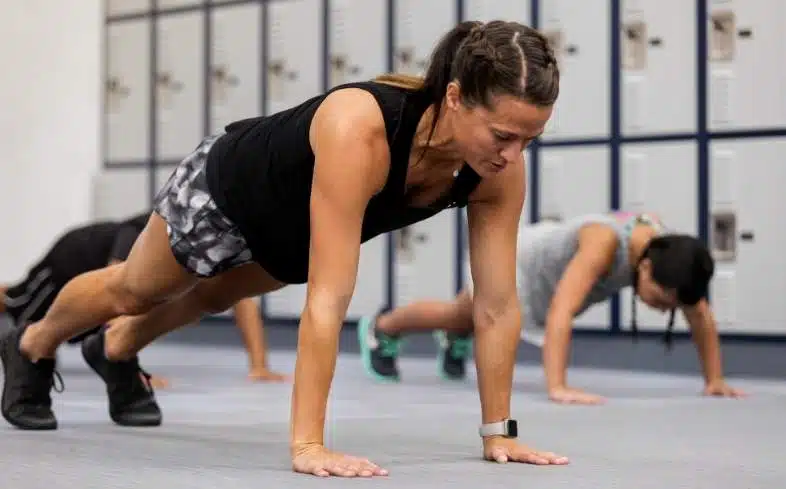
Planks are a popular exercise for training the ab and core muscles. You may have seen people do them on both the hands and elbows and wondered which variation is more effective.
So are planks better on the elbows or hands? Planks on the elbows are better for working the core muscles more effectively. Doing planks on the elbows puts your body more horizontal to the floor, which forces your core muscles to work harder to stabilize you.
That said, planks on the hands are better for those who are new to working out, have very weak core muscles, or want to reduce stress on the lower back.
No matter which variation you choose, using proper plank form is key to ensuring you effectively train the targeted muscles.
In this article, I’ll discuss the muscles used in the plank, whether planks on the elbows or hands are more effective, and show you how to do planks on both your elbows and hands.
I’ll also discuss who should do planks on the elbows and who should do planks on the hands so you can decide which variation is better for your current fitness abilities and goals.
Table of Contents
Muscles Used in the Plank
Core Muscles Used in the Plank

The primary muscles worked in the plank include three of the main abdominal muscles:
- Rectus abdominis
- Obliques
- Transverse abdominis
The rectus abdominis is a long, flat muscle that runs along the entire length of your abdomen and allows you to bend your torso. It is what you see in lean individuals who have six-pack abs.
The obliques are located at the sides of your midsection. They are responsible for rotating your trunk from side to side, bending from side to side, and protecting the spine.
The transverse abdominis is a deep abdominal muscle that runs from the lower part of your ribcage to your pelvis. It helps protect and stabilize the spine.
In a plank, these muscles work together to help keep your body balanced while you’re on your forearms or hands and toes. They also help resist gravity from trying to pull your torso toward the floor.
The transverse abdominis also works to increase spinal stiffness during a plank, which helps protect the lower back.
Planks also work other muscles of the core, including the:
- Obliques
- Spinal erectors
The obliques are the muscles at the sides of your torso that are responsible for rotating it and bending it forward and sideways. The spinal erectors are the muscles in the back that enable you to bend and straighten your spine.
In a plank, the obliques and spinal erectors work together to stabilize the body and keep the ribs and hips in alignment.
Upper Body Muscles Used in the Plank
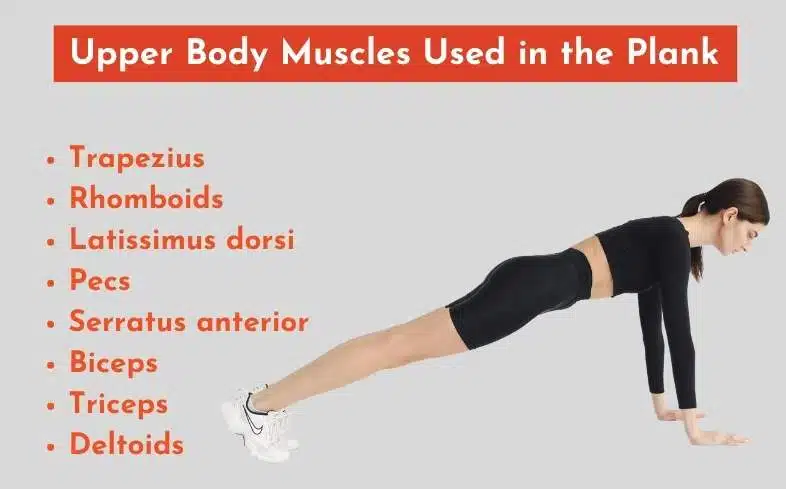
The upper body muscles used in the plank are the:
- Trapezius
- Rhomboids
- Latissimus dorsi
- Pecs
- Serratus anterior
- Biceps
- Triceps
- Deltoids
The trapezius muscles (traps) are a pair of triangular-shaped muscles that extend over the back of the neck and shoulders. The rhomboids are located on either side of the middle of the upper back and assist with movement of the shoulder blades. The latissimus dorsi (lats) is a large, flat muscle that runs behind the arms and along the sides of the body.
The pecs are the chest muscles that are primarily responsible for helping you move your arms. The serratus anterior is a muscle that’s located deep underneath the pecs and shoulder blades. It aids in the movement and stabilization of the shoulder blades.
The rhomboids and serratus anterior, in particular, work hard during planks to keep your shoulders and shoulder blades in the proper position. They also work together with the pectoralis minor (one of the pec muscles) to stabilize the rib cage.
The biceps are the muscles at the front of the upper arm that play a role in bending the elbow. The triceps are located at the back of the upper arm and are responsible for straightening the elbow. The deltoids are the shoulder muscles that help keep your arm attached to your shoulder joint and enable you to move your arms in different directions.
All of these upper body muscles work together in a plank (especially in a plank on your hands) to support your upper body weight and keep your entire body stable and aligned while it’s in a fixed position. The pec muscles also engage to prevent your chest from falling to the floor.
Lower Body Muscles Used in the Plank
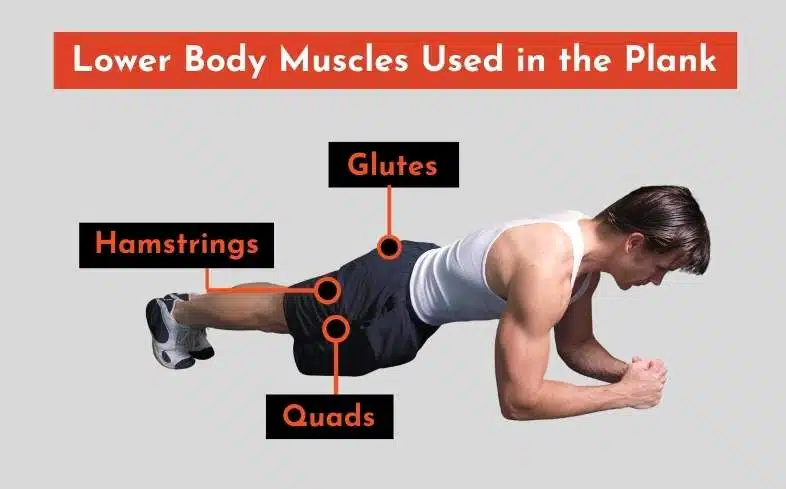
The lower body muscles used in planks are the:
- Quads
- Glutes
- Hamstrings
The quads are the large muscles at the top front of your thigh. They are primarily responsible for straigthening the knee, but they’re also used in various activities such as running, walking, and jumping. They’re attached to your ab and lower back muscles and help keep your hips stable during planks.
The glutes, which are the muscles in the buttocks, are responsible for hip extension, stabilizing the pelvis, and assisting with movement of the thighs. They play a similar role as the quads during planks.
The hamstrings are located at the back of your thighs and are responsible for bending the knee. In a plank, they help keep your body in a straight line.
Are Planks On the Elbows Or Hands More Effective?
The short answer to whether planks on the elbows (which are often called forearm planks) or planks on the hands (which are also called straight-arm planks) are more effective is that planks on the elbows are more effective for targeting more of the core muscles.
This is because your body is more horizontal to the floor and your upper body doesn’t have to work as hard to support you, which increases the demands on your core.
However, doing planks on your hands is more effective at working your entire body. This variation is particularly challenging on your wrists and shoulders because they have to support much of your body weight.
As well, either variation will only be effective if you’re doing it correctly. Common mistakes when doing planks of any kind include the hips shooting up in the air or the hips and lower back sinking. These errors put your body out of alignment, and you won’t get any of the core-strengthening benefits of doing the movement.
Planks are an excellent ab exercise for powerlifters whose squats or deadlifts may be held back by a weak core.
Planks on Elbows vs. Hands: What the Science Says
There’s not much scientific research that directly compares doing planks on the elbows to doing planks on the hands. Many studies instead compare planks on the elbows or planks on the hands to side planks or other advanced planking methods (i.e., doing planks on gymnastics rings).
Even though we’re not talking about side planks in this article, we can still use these studies to draw conclusions about which muscles are activated more in forearm planks and straight-arm planks.
There is one study that found that planks on the forearms and planks on the elbows are equally effective at strengthening the external obliques.
However, other studies show that forearm planks elicit greater activation of the rectus abdominis and external obliques than modified plank variations, especially when the forearms are placed on an unstable surface.
Another study found that planks on the elbows are inferior to other plank variations such as side planks at strengthening the rectus abdominis and obliques. However, the researchers concluded that plank variations such as forearm planks may be better for improving core stability and endurance.
Additionally, researchers at the Mayo Clinic discovered that while standing planks (straight-arm planks with the hands elevated on a bench or another high object) activate the traps, internal obliques, and rotator cuff muscles, they do not elicit as much activation in these muscles as side planks.
Again, we’re not talking about side planks in this article, so I won’t go into too much detail about how that variation stacks up to forearm planks or straight-arm planks.
But as you can see, while there are some inconsistencies in the research, results from most of the studies above suggest that forearm planks are better at activating the obliques and rectus abdominis than straight-arm planks. They’re also effective at improving core stability.
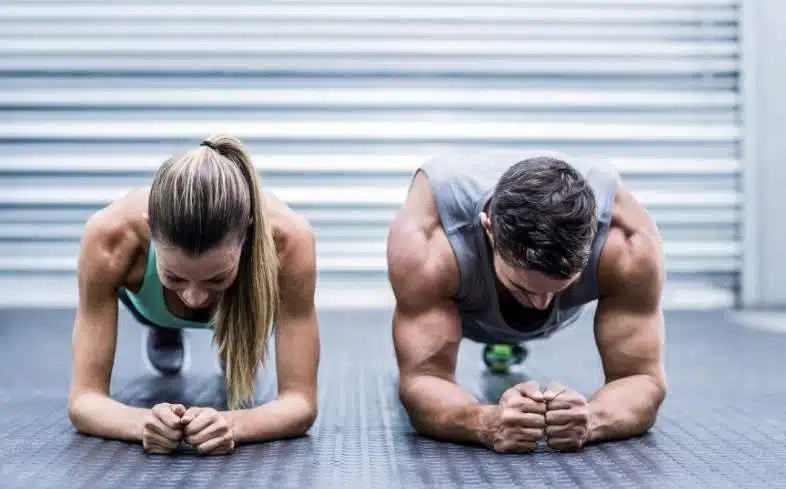
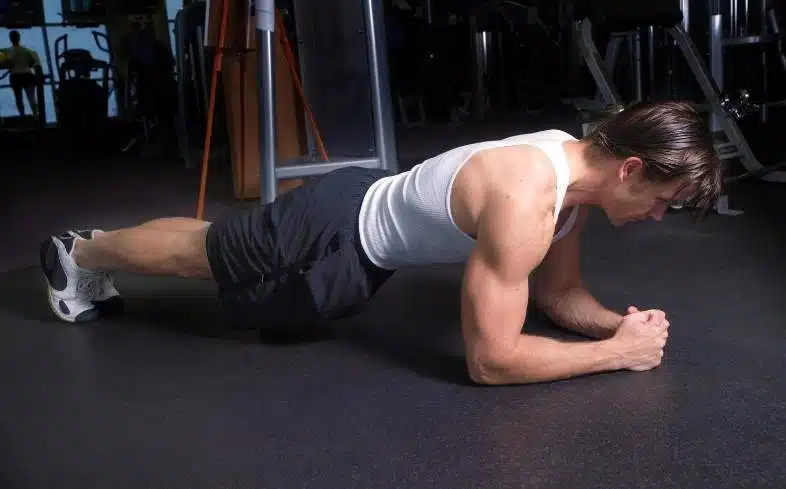
Doing Planks On Your Elbows
How To
Step One: Lie facedown on the floor
Lie down on the floor on your stomach with your elbows directly underneath your shoulders and forearms flat on the floor.
Step Two: Lift yourself onto your toes
Push your forearms into the floor, tighten your abs, and push yourself onto your toes. You can either keep your palms flat on the floor or clasp your hands in front of you.
Step Three: Keep your body in a straight line
Make sure not to point your butt to the sky or let your hips sag toward the floor. If someone were to put a broomstick on your back, it should be parallel or nearly parallel to the floor.
Step Four: Hold the position for as long as you’re able to
Remain in this position for as long as your program calls for or as long as possible. Aim for 30 seconds to start and slowly increase to 45-60 seconds or longer over time.
Pros
- They’re easier on the wrists. Planks on the elbows require little to no stress on your wrists, making them a suitable exercise for people with current or previous wrist injuries. This variation is also better for heavier individuals because the hands and wrists don’t have to hold up as much weight.
- They’re easier on the spine. Compared to other ab exercises like sit-ups, planks don’t put much pressure on the spine. And because sit-ups also work the hip flexors, having weak or disproportionately strong hip flexors can cause them to pull on the spine. You won’t have this issue with forearm planks because you’re in a more static position.
- You can do them anywhere. Planks require no equipment at all. You can do them in a home gym, hotel room, or gym with limited equipment. They also don’t require a lot of space, so you can find a spot to do them even in a crowded gym.
- You can easily change the difficulty. There are several ways to make forearm planks more challenging. You can put your forearms on a stability ball and either stay in place or “stir the pot” (i.e., moving your arms in a circular motion). You can elevate your feet on a low bench or stair to force your body to work harder to stabilize you. You can even place a weight plate on your back to turn planks into a weighted movement and increase the weight as you get stronger.
- There’s a relatively low risk of injury. When you do forearm planks with proper form (keeping your body in a straight line, not letting your hips sag or rise to the ceiling), the risk of injury is pretty low. While you can add weight to them, they’re traditionally not a weight-bearing exercise, so you’re not overloading your spine.
Cons
- They can be uncomfortable on the elbows if you perform them on a hard surface. If you’re working out outdoors or on a hard floor, you may need to place a folded-up towel or sweatshirt under your elbows to prevent discomfort.
- Planks alone won’t help you “get abs.” A common misconception is that doing a bunch of core work will help you lose fat in your midsection. While planks on the elbows are an excellent exercise for strengthening the core muscles, they won’t help you get a six-pack. Not only is spot reduction (trying to lose fat from just one area of the body) a myth, but whether or not you can get six-pack abs is primarily affected by your diet and genetics.
- There’s only so much you can do to progress them. I mentioned earlier that there are several ways to make planks on your elbows more difficult. However, you can only go so far in progressing them by adding more weight, sets, or time. How much weight you can use may be limited by how much you can put on your back by yourself (if you work out alone), and most of us don’t have time to stay in the gym after a workout holding planks for several minutes across more than 3-4 sets.
If you’re looking for even more core exercises, check out 11 Best Cable Crunch Alternatives (With Pictures).
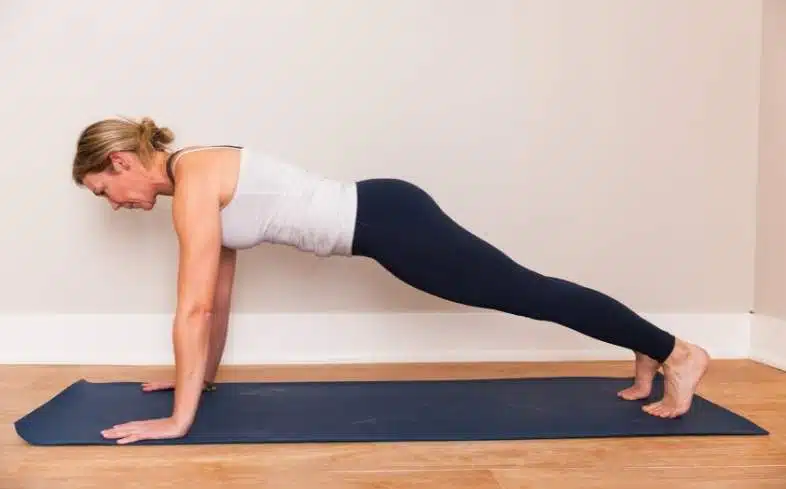
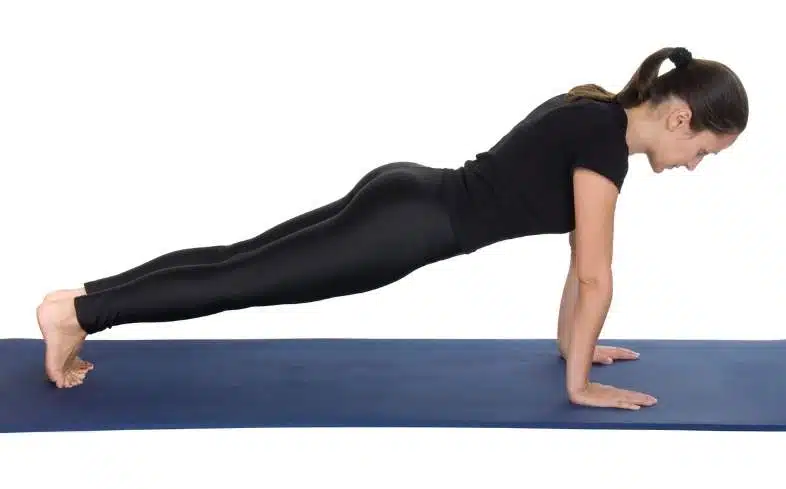
Doing Planks On Your Hands
How To
Step One: Get down on your hands and knees
Kneel on the floor and place your hands on the floor. They should be directly under your shoulders. Make sure your fingers are pointed straight.
Step Two: Get up on your toes
One at a time, place your feet behind you and get up on your toes. Make sure your head, neck, spine, and legs are all in a straight line.
Step Three: Keep your body in a straight line
Make sure your body is in a straight line. Your hips should not be pointed toward the ceiling or sagging down toward the floor.
Step Four: Hold for the desired amount of time
Hold the position for as long as you can or as long as your program calls for. A good place to start is 30-45 seconds. Aim to hold it for 5-10 more seconds each week.
Pros
- You can make them harder or easier. Just like you can make forearm planks more challenging, you can also make planks on your hands more difficult. One way to do this is to put your hands on a set of gymnastics rings to increase the demands on your upper body stability. If you want to make them easier, you can elevate your hands on a step, bench, or wall.
- They’re ideal for beginners or those with weak core muscles. Beginners, people returning from a lower back injury, or anyone with a very weak core can benefit from doing planks on the hands. They still work the core, but they’re not as demanding as planks on the elbows. This makes them an excellent option to include in your routine if you’re trying to build your core strength from a weak starting point.
Cons
- They place a lot of stress on your wrists. When doing planks on your hands, your hands and wrists must support a large portion of your weight. This variation can be difficult to perform if your wrists are weak or you have a wrist injury.
- They burn your shoulders more. Planks on the hands require more shoulder stability than planks on the elbows. If you have a strong core and weak shoulders, you may notice that you can’t hold a plank on your hands as long as you can hold a forearm plank. They can also be harder to do at the end of or the day after a tough upper body workout.
Is It Harder To Do Planks On Your Elbows or Hands?
It is harder to do planks on your elbows than it is to do them on your hands. When you’re on your elbows, your core has to work harder to stabilize you because you’re more horizontal to the floor. When you’re on your hands, the demands on your core aren’t as great because your hands are supporting you and you’re at more of an incline.
It’s similar to how elevating your hands when doing push-ups can make them easier. Increasing the incline you place your body at makes the movement more manageable.
That said, planks on your hands are harder for your hands, wrists, and shoulders. Even if you can hold a plank on your elbows for several minutes, it’s worthwhile to add planks on your hands to your routine every once in a while. It can help you improve your shoulder stability and increase your wrist strength.
Who Should Do Planks On Elbows?

You should do planks on your elbows if:
- You are currently dealing with a wrist injury or have weak wrists in general. Doing planks on your elbows means you don’t have to place any weight on your wrists. They’re ideal if you’re trying to work around a wrist injury or your wrists are otherwise weak.
- You’re a heavier individual. Doing planks on the elbows may be easier for heavier individuals, especially if you tend to carry more fat in your upper body. You won’t have to put a large amount of weight on your hands and wrists, which can be more comfortable and allow you to hold a plank for longer.
- You’re an advanced exerciser. Since planks on the elbows are more difficult, they’re more ideal for individuals who already have some fitness experience.
Who Should Do Planks On Hands?
You should do planks on your hands if:
- You are new to exercise and core training. Planks on your hands are an easier version to start with if you’re new to exercise. They can help you strengthen your core and improve your shoulder stability. They’re also less challenging because your body is at a higher angle to the floor, reducing the demands placed on your core.
- You’re rehabbing an injury. If you’re returning from a lower back injury or an injury to one of your core muscles, planks on the hands are a good starting point as you work on re-developing your core strength.
- You want to train your core without putting too much demand on your lower back. You may choose to do planks on your hands if you’re doing core work at the end of a hard deadlift or squat workout when your lower back is fatigued.
- You also want to work on your shoulder stability. Planks on the hands are more of a total-body movement since they demand more from the upper body muscles, including the shoulders. If you want to get more bang for your buck and improve your shoulder stability and core strength at the same time, planks on your hands are an excellent option.
Planks on your hands can also help you strengthen your core if you have trouble doing sit-ups.
Frequently Asked Questions
Which Plank Position is Most Effective?
Planks on your elbows are most effective for targeting the core muscles. Being more horizontal to the floor means your core has to work harder to keep you stable. You can increase the emphasis on the obliques and rectus abdominis even more by placing your forearms on an unstable surface such as an exercise ball.
Are Planks Easier On Hands or Forearms?
Planks on the hands are easier because you increase the angle of your body to the floor, which means your core doesn’t have to work as hard to stabilize you. However, this variation also puts more stress on your wrists and shoulders because they have to support more of your body weight.
Additional Core Training Resources
- Do Squats Strengthen Your Core? (Research From 5 Studies)
- Do Deadlifts Work The Abs? (Yes, But Not How You Think)
- How To Do A Sit Up Without Lifting Your Feet (5 Tips)
About The Author

Amanda is a writer and editor in the fitness and nutrition industries. Growing up in a family that loved sports, she learned the importance of staying active from a young age. She started CrossFit in 2015, which led to her interest in powerlifting and weightlifting. She's passionate about helping women overcome their fear of lifting weights and teaching them how to fuel their bodies properly. When she's not training in her garage gym or working, you can find her drinking coffee, walking her dog, or indulging in one too many pieces of chocolate.